Students can use the Locker tool to upload and store files. Your personal locker files are confidential, unless you choose to make them public. Group locker areas allow you to work collaboratively on files with others. All locker files are stored in the learning environment, which means you can access them from most computers with an internet connection. The Locker area is not course specific, rather your files from all your courses can be stored in this area. Currently the Locker contains 1000KB of storage space.
The instructor may or may not have this tool available in a course.
- Accessing the Locker
- Creating a Folder
- Uploading a File
- Creating a File
- Editing a File or Folder
- Downloading Files to a Local Computer
- Deleting a File or Folder
- Searching for a File
- Advanced Search Options
- Viewing others' Public Locker Files
- Accessing Group Lockers
Accessing the Locker

- Click the Locker link on the navigation bar. It is located upper-left hand corner of the browser window next to the My Home page.
Creating a Folder
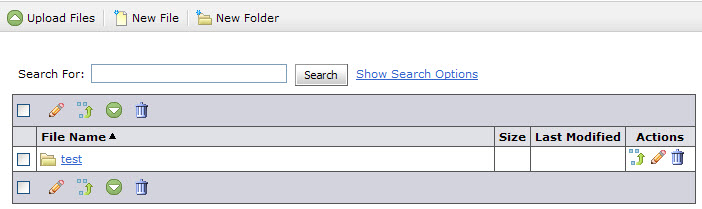
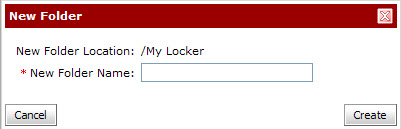 From the My Locker page, click on the New Folder button.
- Enter a Folder Name.
- Click on the Save button.
To create a subfolder: Click on the New folder button when inside the parent folder.
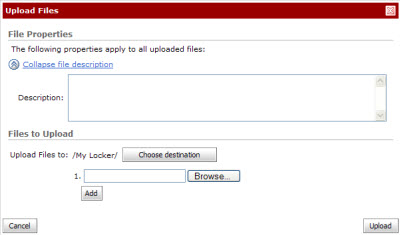
Uploading a File
 You cannot upload applications or programs to your locker. For example you cannot upload files with these extensions..asp, .bat, .config, .dll, .exe.
- Click on the Upload Files button.
- Type a Description of the file.
- Click on the Choose Destination button next to the 'Upload Files To:' to change or add which folder the file should reside in.
- Click on the Browse button and locate the file you want to attach.
- Click the Add button to attach more than one file.
- Click on the Upload button to upload the file(s).
Creating a File
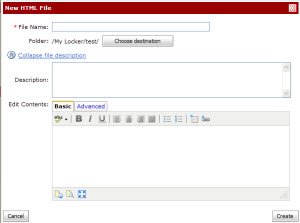 This feature allows the user to create an HTML file that can be editing directly in D2L.
HINT: You should always create the text for a documents in a word processing program then cut and paste the text into the D2L textbox.
- Click on the New File button.
- Enter a File Name.
- Click on the Choose Destination button next to the 'Folder' to change or add which folder the file should reside in.
- Type a Description, if desired.
- Enter Content
- Click on the Create button.
Editing a File or Folder
 Click on the Edit button beside the file or folder you want to edit.
- Update the appropriate fields.
- Click on the Save button.
OR
 Select the checkboxes beside the files/folder you want to edit.
- Click on the Edit Selected Files button at the top or bottom of the file list.
- Update the appropriate fields.
- Click on the Save button
Downloading Files to a Local Computer
 Select the checkboxes beside the files you want to download.
- Click on the Download the selected files/folders button at the top or bottom of the file list.
- Save a copy of the zip folder containing your files to your local computer or storage device.
Deleting a File or Folder
Do one of the following:
 Click on the Delete button beside the file or folder you want to delete.
OR
 Select the checkboxes beside the files or folders you want to delete and click on the Delete button at the top or bottom of the file list to delete multiple items at once.
Searching for a File
 The Locker tool has a number of search options to help you locate your files.
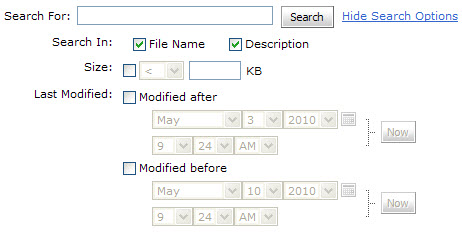
- Enter search criteria in the Search For field.
- Click the Show Search Options link, and select any relevant search restrictions.
Advanced Search Options
File Name
Files names are included in the search process. This option is selected by default.
Description
File descriptions are included in the search process. This option is selected by default.
Both public and private files
Both public and private files are searched. This option is selected by default.
Public Files Only
Only public files are searched.
Private Files Only
Only private files are searched.
Size (Kb)
Only files that meet the size restrictions specified in this field are searched. You must enter a positive integer up to six characters long.
Modified After
Only files that were modified after the date and time specified are searched.
Modified Before
Only fields that were modified before the date and time specified are searched.
Viewing others' Public Locker Files
- Click on the Classlist link in course navigation bar in the appropriate course.
- click on the View Locker icon beside the name of the user whose shared locker files you want to view.
- Click on the name of the file you want to view to open it.
Accessing Group Lockers
Group lockers are restricted locker areas where members of a group can share files. Files posted in group locker areas can be modified by any member of the group. Group Locker access is only available from the course offering it applies to. The Group Locker link will only appear if you have been placed in a group by your instructor and they have activated the Group Locker tool.
Group lockers have the same options as regular lockers with the following exceptions:
- The option to make locker files public is not available.
- There is an option to Email Group Members.
- There is a Modified By column that shows the last person to work on a file.
To Access Group Lockers:
- Click on the Group Lockers button on the top tool menu located on the top-left side of the browser window near the My Home and Locker links.